Using GIT on a Synology NAS
Sometimes I want to have a centralized GIT repo that is private. I could use another provider besides GitHub or purchase a plan from GitHub but since I already have a Synology NAS I can use for my small private repos I don't see the point in uploading my private data to someone else's servers. I'll probably make tons of small private repos and I will not be collaborating with other (or very few, the NAS can have external ports forwarded to it) so using my local NAS to host my private Git repos makes perfect sense.
Recently Synology created a Git Server package that you can install on your NAS. Strictly speaking you don't actually need it to use your NAS to host your Git repos because Synology NAS devices support WebDav. Installing the Git Server package will provide some benefits that I'll discuss. First I'll talk about using only WebDav and then I'll cover the Git Server package and the reasons to install it.
##WebDAV
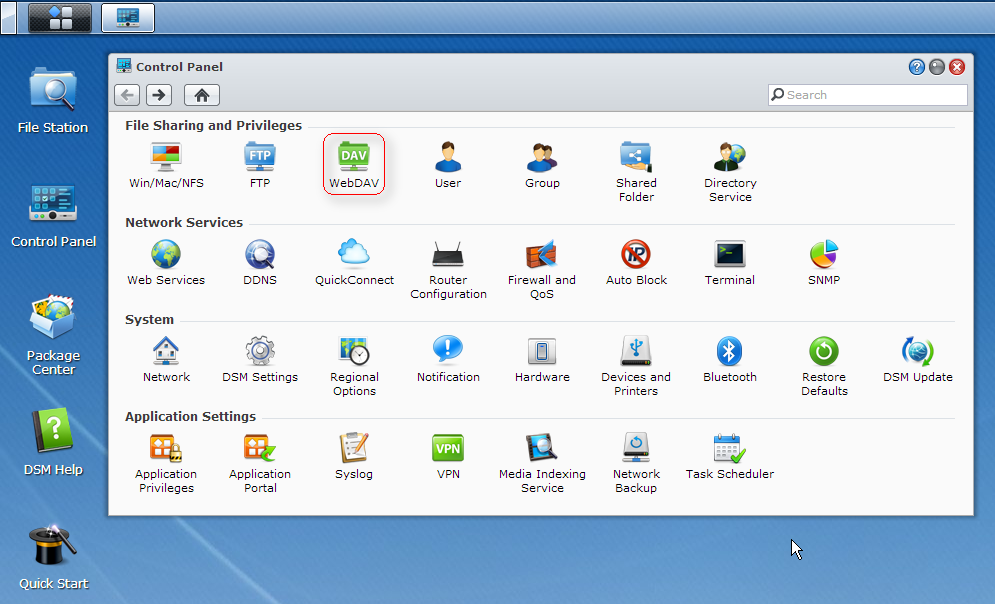
WebDAV should already be installed on your Synology NAS. Locate the WebDAV application in the Control Panel. Open the WebDAV application and enable WebDAV and WebDAV HTTPS connection. Make a note of the port numbers, mine are 5005 and 5006 for HTTP and HTTPS.
With any compatible WebDAV server (like Synology's) you should be able to host Git repos that can receive commits. The only limitation is that you must locally create a bare Git repo and copy it to the server.
###Creating a bare repo
A bare repository is one that does not contain a working copy of the files. This type of repo is stored on a central server and is used for cloning from and pushing to, not for editing any files.
mkdir gitproject.git
cd gitproject.git
git --bare init
git update-server-info
Next, copy the gitproject.git folder to your NAS. You can use any method to copy the folder to the NAS. I created a git-repos folder in my home directory to hold all my repos. The result is /volume1/homes/chase/git-repos/gitproject.git.
On any client you can either start from scratch (clone the empty server repo) like so:
git clone http://chase@192.168.1.1:5005/home/git-repos/gitproject.git
mv gitproject/.git/hooks/post-update.sample gitproject/.git/hooks/post-update
chmod a+x gitproject/.git/hooks/post-update
Or you can upload a local repo to the empty server repo.
mkdir gitproject
cd gitproject
git init
mv .git/hooks/post-update.sample .git/hooks/post-update
chmod a+x .git/hooks/post-update
git remote add origin http://chase@192.168.1.1:5005/home/git-repos/gitproject.git
touch README
git add .
git commit -a -m "Initial Commit"
git push origin master
In both cases the post-update hooks will automatically run git update-server-info for you on every update which creates the required files for clients that access the repo over HTTP/HTTPS. In the examples above change out the username, chase, and the IP address to match your configuration. When possible, use HTTPS for secure communication. Unless you've installed a signed SSL certificate in your Synology NAS then git will refuse to talk to your HTTPS WebDAV server running on port 5006 unless you configure git to skip SSL cert verification. The steps above would become:
git -c http.sslVerify=false clone https://chase@192.168.1.1:5006/home/git-repos/gitproject.git
mv gitproject/.git/hooks/post-update.sample gitproject/.git/hooks/post-update
chmod a+x gitproject/.git/hooks/post-update
And uploading a local repo over HTTPS becomes:
mkdir gitproject
cd gitproject
git init
mv .git/hooks/post-update.sample .git/hooks/post-update
chmod a+x .git/hooks/post-update
git config http.sslVerify false
git remote add origin https://chase@192.168.1.1:5006/home/git-repos/gitproject.git
touch README
git add .
git commit -a -m "Initial Commit"
git push origin master
None of the above GIT steps are specific to Synology NAS devices other than the process of enabling WebDAV on the NAS. Any WebDAV server should be usable as a central repository store although I have come across some (Oracle Beehive for example) that won't work.
##Git Server
Installing the Git Server package on the NAS gives you two benefits:
- The root user will be able to create repositories directly on the NAS device.
- Git clients will be able to use the SSH protocol instead of HTTP/HTTPS.
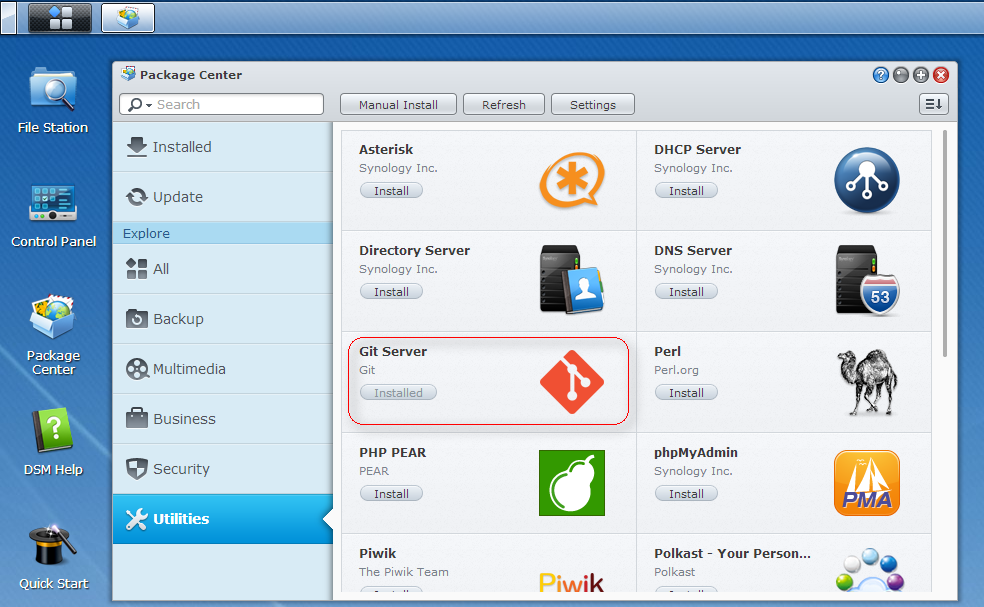
Start by using the Package Center in DSM to install Git Server which you'll find in the Utilities category.
Next, ssh into the NAS device as the root user. You may have to go into the Terminal settings in the Control Panel in order to enable the SSH service.
cd /volume1/homes/chase/git-repos
mkdir gitproject.git
cd gitproject.git
git --bare init
git update-server-info
cd ..
chown -R chase:users gitproject.git
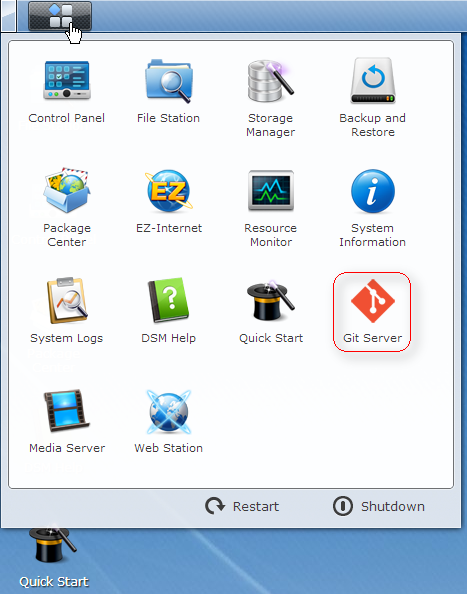
At this point the repo is created and ready on the server. If WebDAV is enabled clients can start accessing the repo over HTTP/HTTPS. In order for clients to use the SSH protocol you must run the Git Server application on the NAS. From the Application/Start menu, open Git Server.
Checking a user name in the Git Server application enables SSH access for the selected user. But not the full log in remotely to a interactive shell type of SSH. It sets up the user to have shell called git-shell which will limit them to only performing git related activities over SSH. You can click on the question mark along the title bar in the Git Server application to get the help page with more detail.
To check out the repo on a client you can perform:
git clone ssh://chase@192.168.1.1/volume1/homes/chase/git-repos/gitproject.git
To create and commit a repo on the client side you would perform the following steps:
mkdir gitproject
cd gitproject
git init
git remote add origin ssh://chase@192.168.1.1/volume1/homes/chase/git-repos/gitproject.git
touch README
git add .
git commit -a -m "Initial Commit"
git push origin master
If you'd like to use SSH key based authentication instead of passwords you can with a couple of steps.
Generate a key-pair with ssh-keygen -t rsa. This command may vary depending on your environment. I'm running under Cygwin on a Windows 7 machine. I'd recommend you set a passphrase when asked otherwise anyone that obtains your private key will have access to your repos.
In the user's home directory on the NAS create a .ssh folder.
Copy the public key (~/.ssh/id_rsa.pub) generated in step one to the Git user's .ssh folder created in step two and rename the file on the NAS to authorized_keys. If this file already exists you should append your public key file to the existing file - cat id_rsa.pub >> authorized_keys.
Set the owner and permission information on the files. ssh into the server as the root user and run: (change chase on both lines to match your user name)
cd /volume1/homes/chase/
chown -R chase:users .ssh
chmod 700 .ssh
chmod 644 .ssh/authorized_keys
The Synology SSH daemon doesn't use key based auth by default. To enable it use vi to edit the /etc/ssh/sshd_config file. Find the following lines:
#PubkeyAuthentication yes
#AuthorizedKeysFile     .ssh/authorized_keys
Modify them to be:
PubkeyAuthentication yes
AuthorizedKeysFile     .ssh/authorized_keys
Save the file.
Now when you git push origin master you shouldn't be prompted for the remote password. You might be prompted for the local passphrase if you set one but that's a different matter and depends a lot on your environment.